


In DRAGON BALL: THE BREAKERS, the goal of the Survivor is to escape the Temporal Seam while avoiding the Raider.
The beginning of the game as a Survivor is decisive because it’s when the Raider is not at its full power level yet: this is why your main goal should be to focus on finding as many Power Keys as possible along with resources such as your skills, vehicles and Radars, since they will have utility for most of the phases of the match.
Each Survivor should try to focus on the zones that are not too crowded by their allies.
This way, resources can be shared more homogenously across the team, and it is less likely that some players will fall prey to Raiders.
When exploring, you can also find crates on the field and destroy with your attack in order to get items such as Change Power and Zeni. Zeni can be used on Vending Machines on the field.
Reading the state of the game quickly is essential to make the best decisions and escape from the Temporal Seam on time.
The game interface will help greatly in this.


In DRAGON BALL: THE BREAKERS there are five zones, each of which with a Power Key to find and install: when you find the Power Key you must set it up in order to activate the Startup System.
Knowing which key is still to be found is critical for not wasting time as the Raider looks for you. As the game progresses, each zone will change appearance to signal its status.
In the example above, Zones A and B’s power key has not been found or set.
Zone C’s Power Key has been found and installed.
Zone D has been destroyed by the Raider and is inaccessible.
Zone E’s Power Key has been found, but not yet set.

Whenever you enter a Zone labeled like E, make sure to look around for a glowing pillar of yellow light, which signals where the Key must be set.
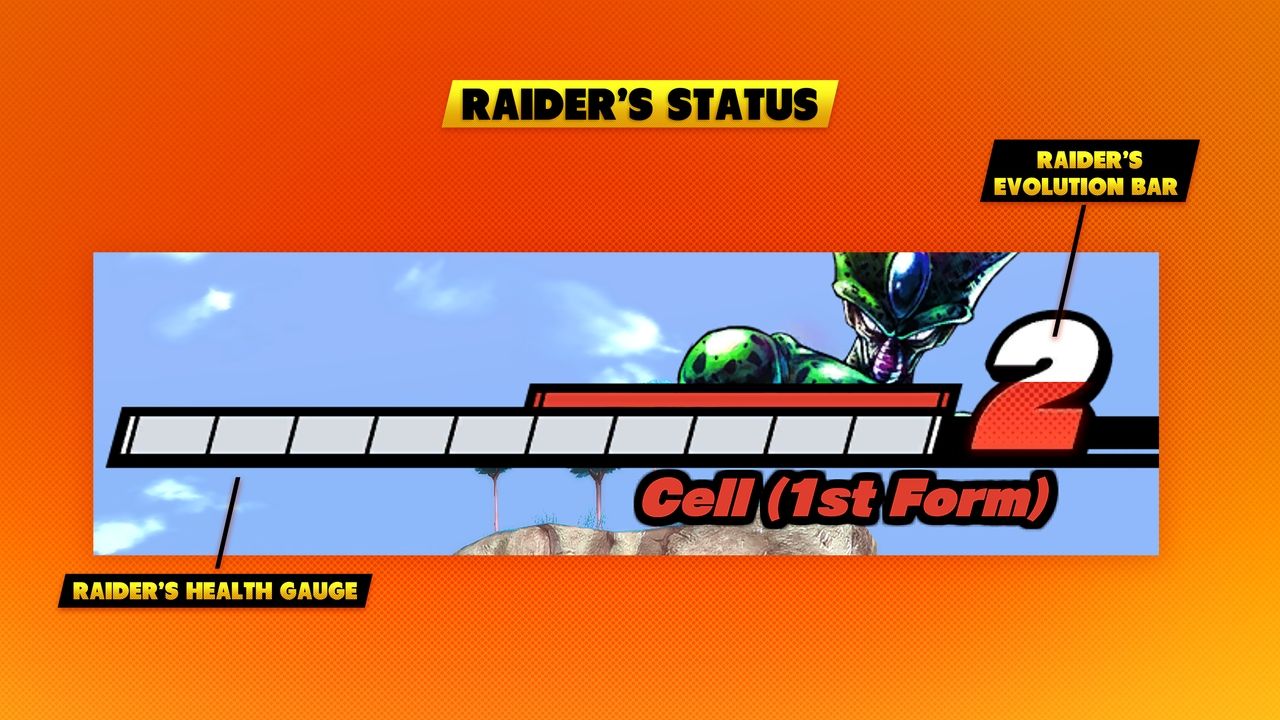
Knowing your enemy is essential, so keep a close eye on this area of your screen, which shows the Raider’s health bar and its evolution level.
The health bar will tell you how close the Raider is to defeat. When its health is low and occasionally drops, there is most likely a fight happening. If your resources allow for that, consider joining in the fight to add pressure on the Raider and maybe even defeat it.
Careful though! Some Raiders evolve when they are defeated.
In general, when you play as a Survivor pay extreme attention to the level of the Raider. The higher the level is, the powerful it gets so try avoiding fighting when the level is high.
As a last tip, keep an eye on how close the Raider is to evolve. Once its gauge level is filled in red, the evolution will trigger, and the Raider will unlock new skills and become an even bigger threat.

The little menu on your left shows you the skills you have decided to use for this game. Once you use them for a certain amount of period, they will go on cooldown and will be unusable periodically.
ADVANCED TIP! Keep in mind which skills are more useful to escape an ambush from the Raider and which ones are more useful to simply navigate the map.
Try to preserve the former in case you unexpectedly encounter him and use the latter more frequently to traverse long distances faster.
Dragon Change is the most useful to delay the Raider and distract him or even damage him: using it will allow you to draw power from your Transpheres and take resemblance to a Super Warrior to oppose the Raider for a limited amount of time.

Like your skills, your Dragon Change goes on cooldown after transforming for a certain amount of period. When the above UI “D” crackles with lightning, your Change Power is ready to use.
After using Dragon Change, the % number will tell you how close you are to using it again.
Level of Dragon Change: this is represented by the number next to your avatar: as you collect Change Power, you can increase your Dragon Change level and unlock more powerful forms. You will also have more energy to spend before the transformation runs out.
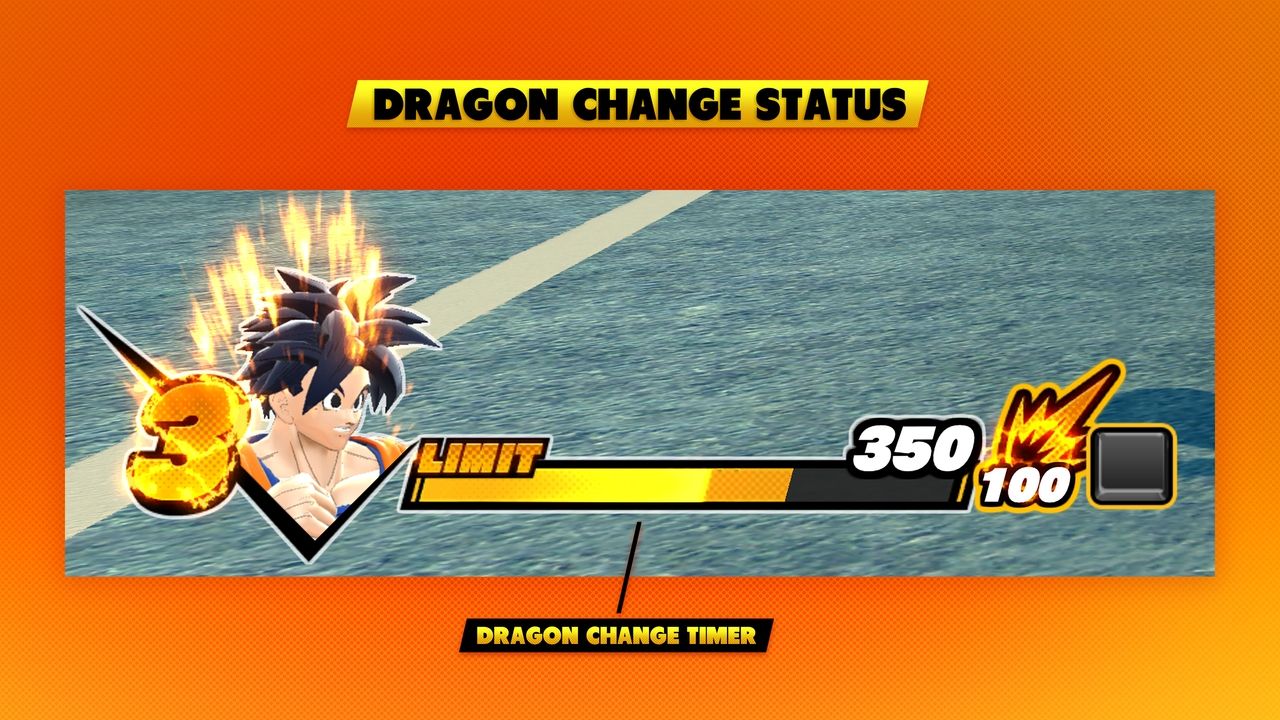

Once you are transformed, you will notice a bar that will deplete through time: this is the time you have left before the Dragon Change deactivates and goes on cooldown.
The transformation period decreases as time goes by, when you take damage and when you use Super Attacks.
Make sure to keep an eye on the timer, there is nothing more dangerous than to run out of time and go back to your base form as you are in the middle of a fight with the Raider.
Reading the Survivor Team status

If the icon of Survivor is red, it would mean that Survivor has been knocked down and needs to be revived.
When you see a Survivor down try to revive the Survivor before the timer runs out!
You will be able to locate them (even across walls) and read their distance on your user interface.
When their image has a red cross on it, it means they have been defeated and cannot be revived.
Moving around the map
Moving around the map with strategy and care can make a lot of difference in the amount of time you will survive and how many useful items you can gather.
First, make sure to avoid open spaces. All Raiders can fly, and you will be spotted and focused very quickly if you let yourself be visible. Don’t forget to get creative with your hiding spots: for example, you can crouch in tall grass to hide more easily, or you can dive deep in the water to avoid being detected.
During your exploration, make sure to keep mental notes of the nearby caves.
You will need to explore them to get items, but they also double as convenient hiding spots. A smart move is also to keep a vehicle close to you whenever possible, both to cross the map faster or to run away from the Raider in case it spots you.
Some skills can also be used as convenient escape devices. A few examples can be:

Grappling Device: You can point at any surface and dash to it to save precious time while crossing areas of the map, but you can also use it to quickly disappear from the Raider’s sight.

Saiyan Pod: Jump into the pod and send yourself across the map in an instant.

Hovering device: You can use it to extend the distance covered in a jump or fall, which is useful when moving between elevated vantage points like mountains or buildings.
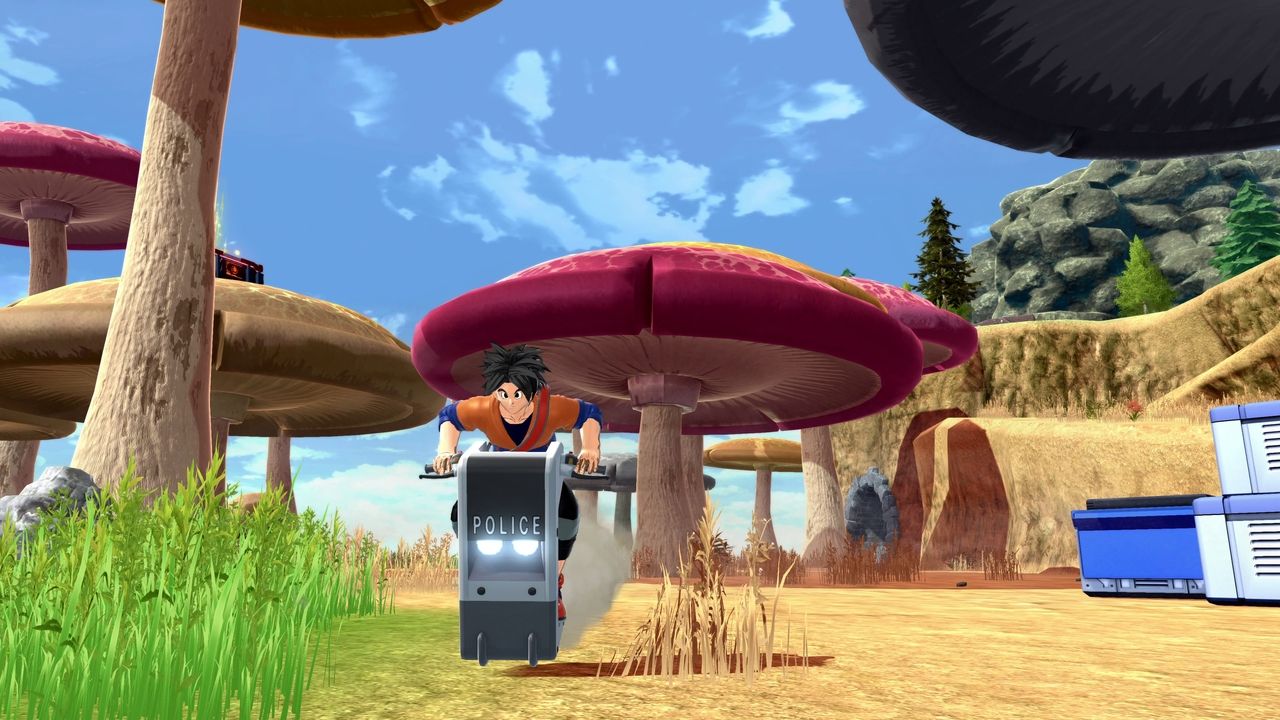
Single-Wheel Motorbike: Use it to go around the map faster than by foot. If you equip the capsule version of it, it will also come with a very useful boost feature that will propel you forward very fast if you keep the command pressed. Combined with a good dose of evasive maneuvers, you can confound the Raider and escape from sight!
Controls
Practice makes perfect, but the basics are essential! Always keep in mind how to control your character and don’t hesitate to re-map your commands in case they fit your playstyle better.


DRAGON BALL: THE BREAKERS is available today on PlayStation 4, Xbox One, Nintendo Switch and PC.
For more information about DRAGON BALL THE BREAKERS, check the latest news!


